Custom Hand Poses are supported in VRIF through the built-in Hand Poser component, using a Unity animation, or through your own custom solution. You can freely mix and match between the two, or even create your own, to give you the most flexibility when it comes to animating your hands in VR. Lastly, you can combine this with the included AutoPoser or Hand Tracking tools to really streamline your pose creation process.
¶ Quickstart
Saving a hand pose couldn't be easier - just locate the HandPoser component on the hand model and click "Save Pose". This will save the current hand data as a Scriptable Object. You can save a pose from within the editor - even during run time. Looking to convert an existing animation to a Hand Pose? Just animate your hand to the desired position and save.
¶ Video Walkthrough
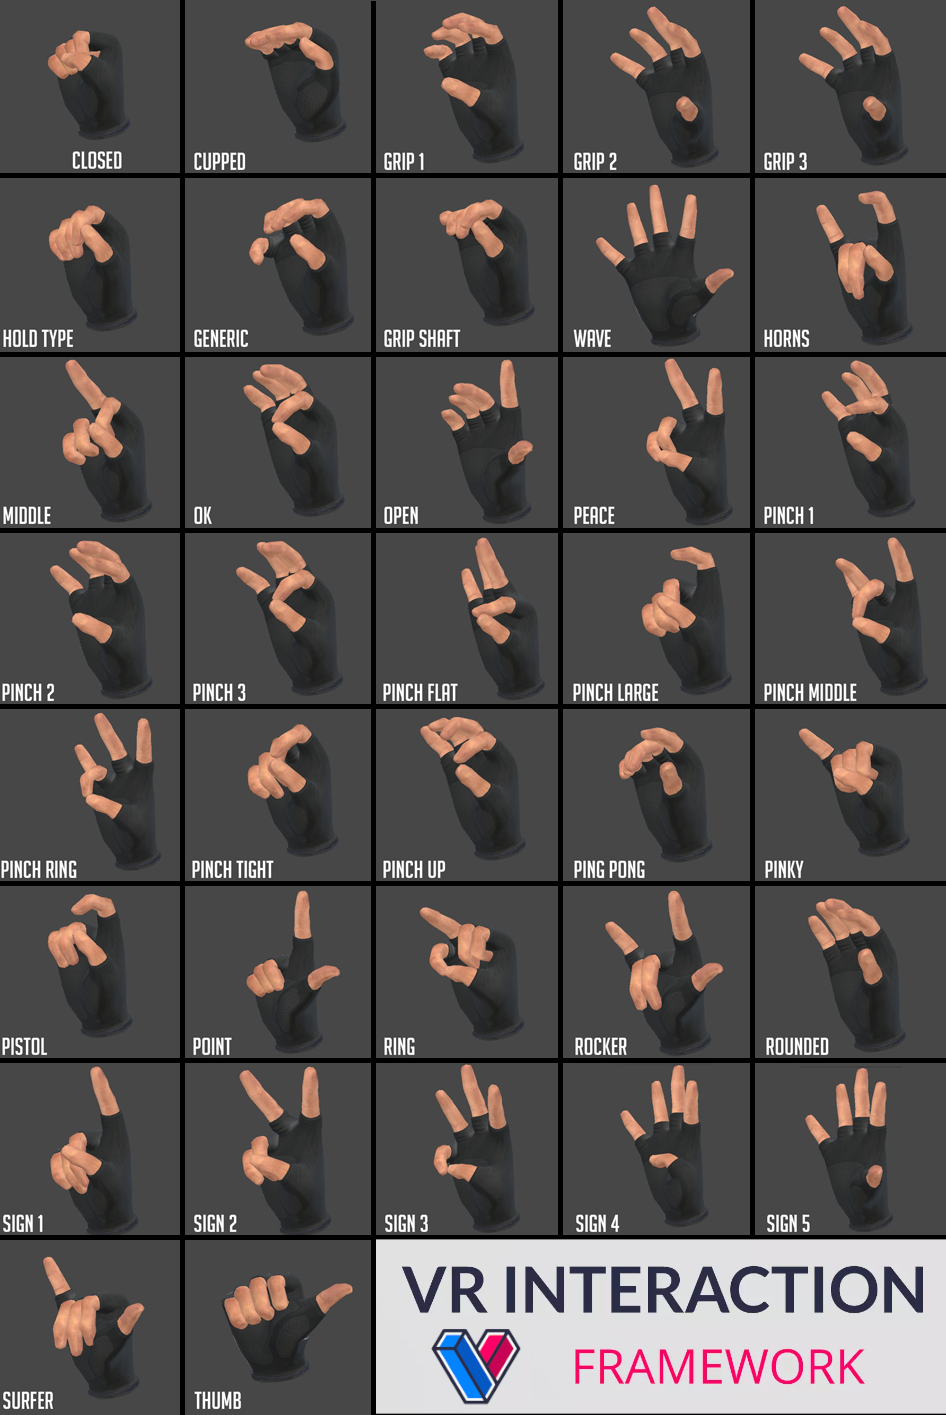
¶ Built-in Poses

Credit: @RobOnTwoWheels#7200
¶ How does it work?
The HandPoser works by storing a list of transform data such as name, position, and rotation. These transforms may be defined by hand bones: "thumb", "index", "middle", "ring", "pinky", and "wrist" for convenience, but they can be any transform and do not necessarily have to hand-related. When a HandPose is saved it is stored as a Scriptable Object in the Poses/Resources directory. Storing these in a Resources directory allows them to be loaded at runtime using "Resources.Load".
¶ Setting up new hand models
**From Scratch - ** If you are creating a hand model from scratch you may want to use the existing hand rig and simplu model over that. That will allow you to keep all of the existing animations and handposes. This is how the gloved model was created - by modelling a glove over the hand model and then removing the vertexes behind the glove.
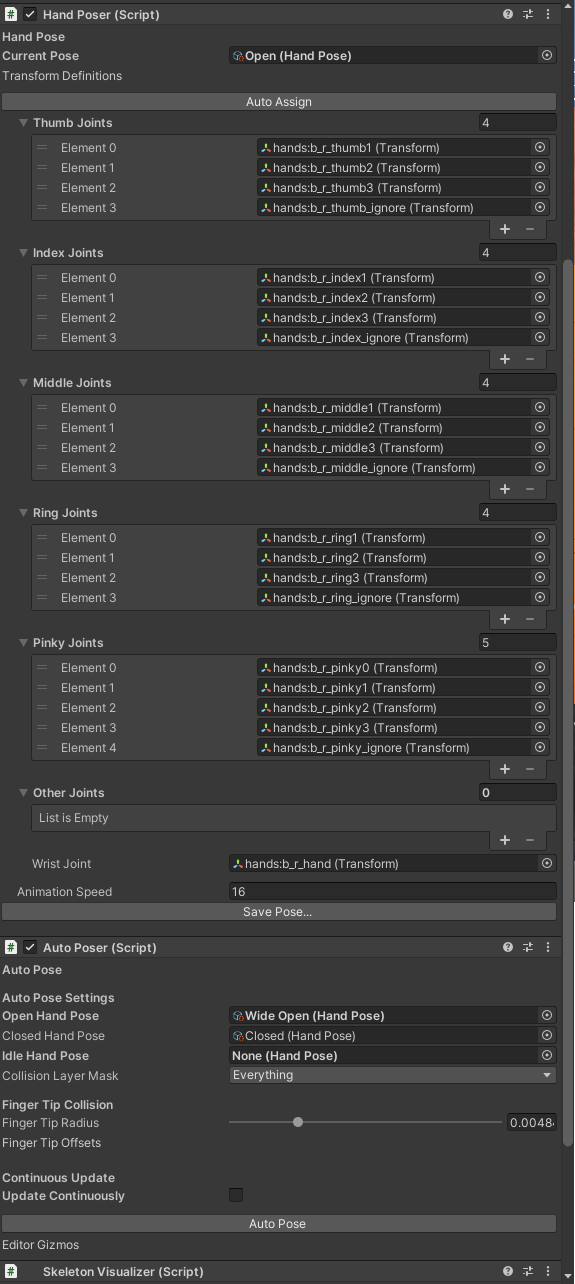
**Existing Model - ** If you have an existing model you can set it up using the Hand Poser by setting the "Transform Definitions" property on the Hand Poser component. Here you can specify any bones for each finger. You can click the autosetup button to automatically add these transforms based on their name. For example, each finger bone transform should have the "thumb", "index", "middle", "ring", and "pinky" name in it (not case sensitive) to automatically map, but you can also just drag the transforms in. Any transforms that don't fit into the finger naming convention are put into the "Other" list. You can use this to store poses for anything that isn't considered a "finger".
*Example Definitions : *

*Tip - The Wrist definition can be helpful to use to move your entire hand
I recommend keeping the "Other" list empty - don't save any pose data that you don't need.
Dev Note - The Hand Poser component can be used for anything - not just hands. It simply stores Transform information and allows you to save and load that data. You can use it for creatures, props, or anything your imagination can come up with.
¶ AutoPoser
The autoposer tool can really speed up the creation process. It can be used in the editor, paused, or during gameplay. If you enable the "Continuous Update" option the auto poser will continue to run, even in the editor. This allows you to move the object or hand model around to find a good pose position. From there you can tweak the pose and make fine adjustments before saving the pose for later use.
The AutoPoser works by specifying an "Open" pose and a "Closed" pose. The poser will move between these poses until it detects a collision on each finger tip. By default the finger tips will use a Spherecast to determine a collision. However, if you would like more precise control you can specify "Finger Tips Offsets" - these are components that you can parent to your finger bones and manually position / size to perfectly fit your hand geometry. Click the "Auto Setup" button to automatically have these components added and defined for you, ready for you to start tweaking thei size and positions.
Tip : I recommend using a wide-open, flattened hand pose to make sure the auto poser has plenty of room to find a collision.
¶ Creating poses using Oculus Quest Hand Tracking
You can use your Oculus Quest's Hand Tracking feature to create new hand poses based on your real world hands. This really speeds up the hand posing process, as you can see your updates in real time. To use the hand tracking feature, just make sure you have the Oculus Integration package imported. You can then run the scene located in /HandPoser/Quest HandTracking. In this scene you will see a reference 3d model posing to match your tracked hands. You can then hit the button to save that hand pose in the Poses/Resources/ directory.
¶ Skeleton Visualizer
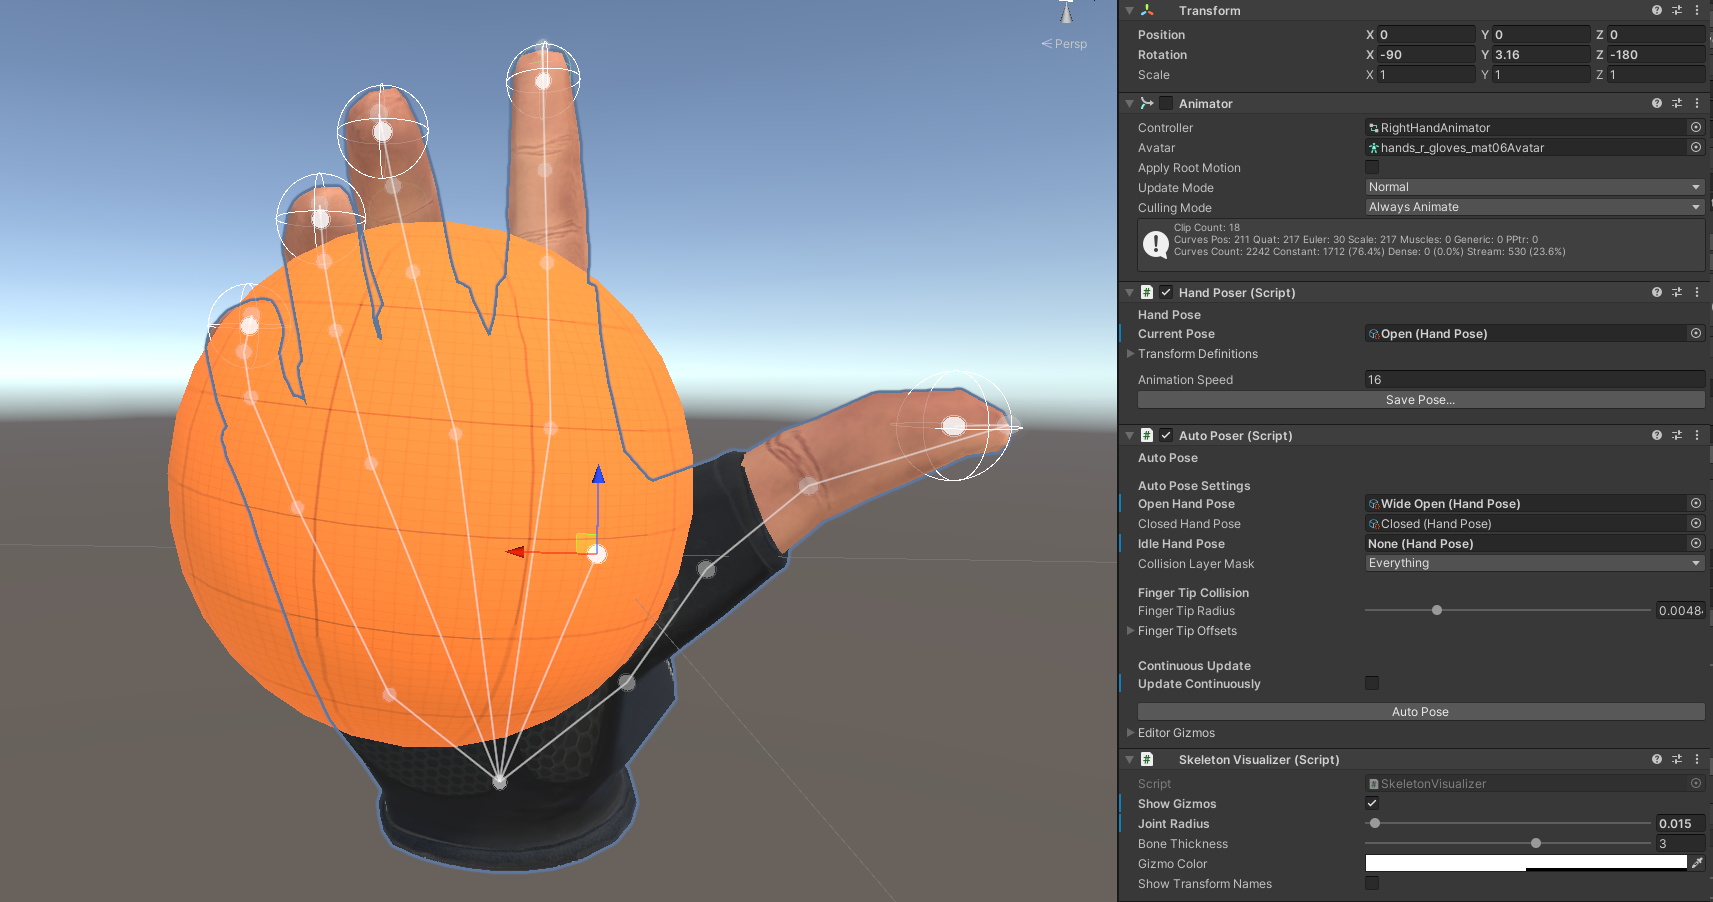
The Skeleton Visualizer component is a helpful script that will display gizmos in the Unity editor for the bones in your hand. The circular gizmos also serve a purpose in that they can be quickly selected from within the editor, without you having to dig into your complex hand hierarchy to find the correct bone.
¶ Creating Hand Poses with Animations
Creating Hand Poses via Unity Animation can take a little more time to setup due to needing to set up an Animator component, but they can give you some additional blending options or allow you to use existing animation assets.
Custom Hand Poses can be assigned to each Grabbable. Hand poses work by setting a Pose ID parameter on the hand Animator whenever a Grabbable is held. These Hand Pose ID's are defined in HandPoseDefinitions.cs
To learn how to create custom hand poses using the animation method, check out the second half of this excellent video by Valem:
Custom Hands start right around around 7m:35s